If you'd like to make your own cassette loop (for use in a normal cassette deck, or in a fancy 4-track cassette recorder), there are lots of videos and how-to pages on the internet. While I found them helpful, I found that practice was the key. In my photos below, I don't really shed any new light on the matter, but maybe you'll see something that isn't available elsewhere.
First, start with a cassette. I started with an old one of mine that had material already on it. If you're really good, you can purposely excerpt a piece of tape with an audio segment that you're purposely trying to loop. I didn't have such high hopes. I just grabbed a tape that was in the same box as my 4-track cassette recorder. It was a cassette that originally had an Ani DiFranco album (that I recorded from CD probably around 1998). I then re-purposed the cassette to record a jam session at a friend's house (Hi Paula!) in 2000 ("Alpine Music Fest"). Since I have all of that material elsewhere, I decided that this is a good tape to sacrifice for my experiments with making a cassette loop.
Below, you can see the cassette after I opened it up. With it open, I cut the tape and removed the tape from the two white plastic spools.
First, start with a cassette. I started with an old one of mine that had material already on it. If you're really good, you can purposely excerpt a piece of tape with an audio segment that you're purposely trying to loop. I didn't have such high hopes. I just grabbed a tape that was in the same box as my 4-track cassette recorder. It was a cassette that originally had an Ani DiFranco album (that I recorded from CD probably around 1998). I then re-purposed the cassette to record a jam session at a friend's house (Hi Paula!) in 2000 ("Alpine Music Fest"). Since I have all of that material elsewhere, I decided that this is a good tape to sacrifice for my experiments with making a cassette loop.
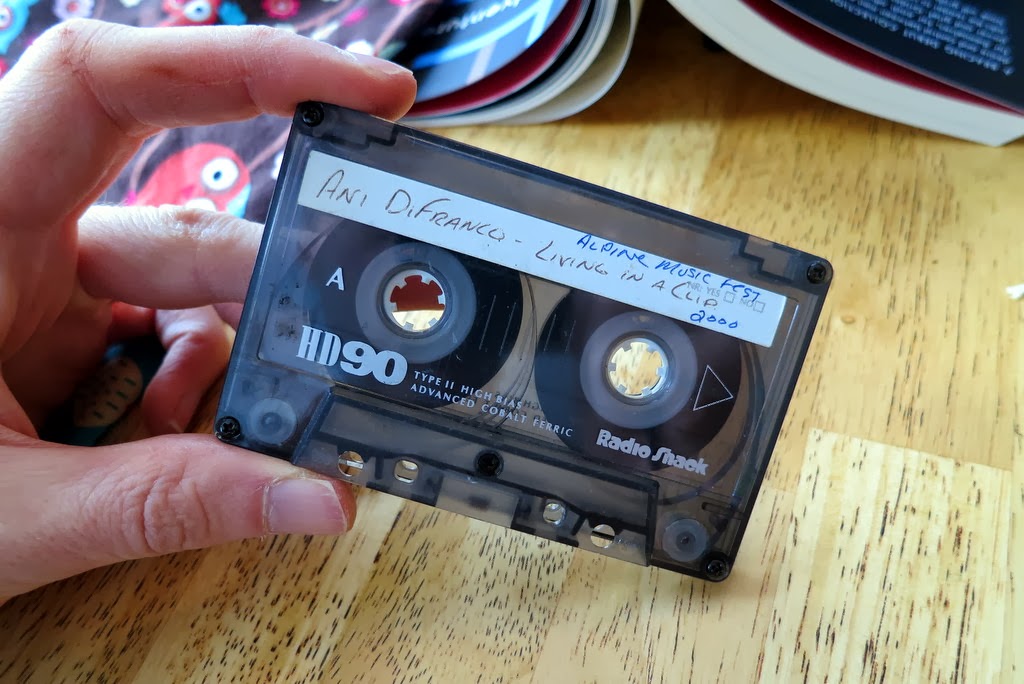 |
| An old cassette. It once was Ani DiFranco. Then it was re-used to record a jam session. "Alpine Music Fest 2000". |
Below, you can see the cassette after I opened it up. With it open, I cut the tape and removed the tape from the two white plastic spools.
 |
| I opened up the cassette to remove the long spools of tape. |
I then started trying to make my tape loops. As mentioned later, it took me four tries to get one that worked. The photo below is the configuration that eventually worked...I used both plastic spools. With both spools in place, I cut a segment of tape that was approximately correct in length, including a small amount of overlap...about half an inch (~1 cm) is probably sufficient, though you might want a little more overlap just to make it easier to handle.
 |
| I cut a short segment that would fit once around. |
Then, I got out my adhesive tape. You want something really thin, so I tried my generic brand and my name brand tapes. For my first two trials (both failures), I used the name brand "Scotch" tape shown on the right. For my third trial (also a failure) and for my fourth trial (a success), I used the store brand. The store brand did seem better in this case...the Scotch brand was "matte finish", which meant it was thicker. No good. Go for the thin (but sticky!) stuff.
 |
| The cheap clear adhesive tape on the left worked much better than the "fancy" adhesive tape on the right. |
Once you've picked the tape that you want to use, you need to cut a *really* small piece. It should be more narrow than the audio tape...and it shouldn't be too long. You can see my piece of tape in the photo below.
 |
| I then cut the smallest piece of adhesive tape ever. |
Next is the really tricky part. You need to use the little piece of adhesive tape to splice together the ends of the audio tape. While it's OK to have the ends of the audio tape overlap, it is very important that they are align straight. If you don't have a "splicing block" (I don't have one), then this is where you just need to try it and practice. It was really hard at first. Then, I got a system that worked really well for me. You can see the results below.
 |
| I used the little piece of adhesive tape to splice the audio tape it into a single loop. It ended up being about 5 seconds long. |
The only thing wrong with the photo above is that the tape is too tight. When it didn't work (at first), I tried loosening the tape a little bit. How? Well, if you look closely down by each one of the little white rollers, you'll see that the tape goes around a thin dark-plastic post. To make my tape loop a little looser, I pulled up the tape and allowed it to NOT pass around one of those posts. This was just the amount of slack that it needed. It worked! Yay!
To finish the loop, you can use your scissors to trim away any audio tape that overlaps at the splice. You don't need to get it perfect, but it is good to minimize the overlapping tape. Then, put the cover back on the cassette and screw it back together. Oh, and then rename the cassette. In my case, this is its third name!
 |
| Here's the re-assembled cassette. Ani DiFranco and the Alpine Music Fest have now become a loop tape! |
Now it's ready to be put in your cassette deck and played. If you're like most people, your first bunch of trials won't work. But if you keep trying, you'll get there. As you can see in my video, I had a cool loop already recorded onto my loop tape. Maybe you'll get lucky, too!
 |
| With excitement, I popped it into my 4-track cassette recorder and gave it a listen. It didn't work. The tape wouldn't move. So I tried again. And again. And again. On my fourth attempt, though, it worked great! |
My next steps are to record some droning sounds on the four different tracks so that I can dynamically mix them together in a moody way. I'm thinking that it will sorta be like my Kaossilator Pro (which is built to have four independent loops)...except the tape-based loop will be dirty sounding and not clean like the Kaossilator. Hopefully, it'll be dirty in a good way.
After that, my plan is to see if I can defeat the erase head on the Portastudio so that I can attempt sound-on-sound layered recording. Again, it'll be like the Kaossilator (which does sound-on-sound) except the Portastudio can add all of the sound mangling artifacts that come with audio cassettes. Here I'm particularly interested in what happens when you overload the tape (ie, write on it many times without erasing) and what happens when you bounce back and forth between tracks so many times that the generational losses become dominant. This could be seriously fun!
Wow! That is so cool. It is so nice that you were able to preserve all your old cassette tapes. Gt is also great kjak you were able to discover a new way of looping your favorite cassette sounds. Cassette tapes can be considered vintage classics nowadays and need to be preserved, if at all possible.
ReplyDeleteRuby Badcoe
Synth Hacker: Cassette Tape Loop >>>>> Download Now
Delete>>>>> Download Full
Synth Hacker: Cassette Tape Loop >>>>> Download LINK
>>>>> Download Now
Synth Hacker: Cassette Tape Loop >>>>> Download Full
>>>>> Download LINK M8
This is awesome! How did you get the the one track to be reserved, is that a separate effects pedal or is that part of the tascam? I have a Tascam 414 and have cut the tape to make a 5 second loop, looking around to see what else i can do with it
ReplyDeleteHello,
ReplyDeleteNice modification!
What are the voltages of the transformer secondary windings of the Tascam portastudio 464?
If someone has the service manual of this mixer or diagrams more accurate than the user manual, it would be perfect!
Thank you in advance.
This comment has been removed by a blog administrator.
ReplyDelete